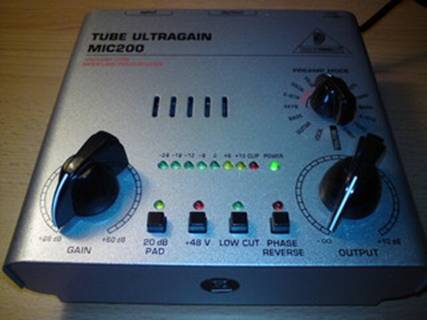
Behringer Tube Ultragain mic200
repair/popravilo
![]()
![]()
MIC200
Repairing the
block kond.,/popravilo blok
kondenzatorja.
Zaradi
dotrajanosti ali slabega vzdrževanja,izpostavljanja tekočinam,transporta itd..se
nam lahko večkrat zgodi da odpove kakšen elektronski element. Naprava ne deluje.
Due to expire
or poor maintenance, exposure to liquids, transport, etc. .. we may
happen several times to faul the
electronic element. The
device does not work
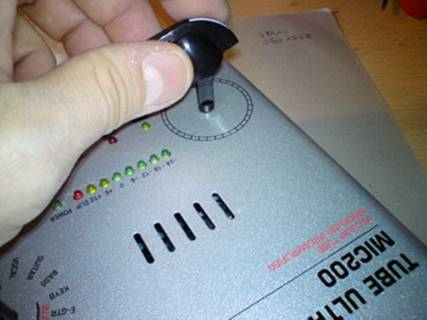
Previdno
odvijemo pokrov in ga odstranimo na varno. Odvijemo tudi vijake na zadnji
strani vezja in odstranimo gumbe z ohišja.
Carefully unscrew the cover and remove it to safety. Unscrew the screws on the back of the circuit board and remove buttons from housing.

Odstranimo vezje z ohišja, da lahko dostopamo do elementov
na vezju. Odstranimo
tudi vezje na panelni plošči ohišja.
Remove the
circuit board from the housing
in order to access the elements in the circuit. Remove
the circuit board panel from housing.

Ker smo že razdrli napravo lahko zamenjamo elektronko. Zaradi boljšega delovanja jo bomo zamenjali z kvalitetnejšo 12AX7EH gold. Odvijemo podnožje elektronke in jo zamenjamo.
Since we
have already dissasembled device we can be replace
the tube. Due to the better functioning
we will replace
it with a higher quality 12AX7EH gold. Unscrew the tube socket and replace
it.


Odvijemo
še stranski del ohišja,da pridemo do vezja z vhodi in izhodi. Bodimo previdni
pri odvijanju matic z vtičnic,da ne poškodujemo ohišja.
Unscrew the
place at the side of
the housing to get to the circuit
with inputs and outputs. Let's be careful when
loosening the nuts with a socket
to avoid damaging the housing.


Sedaj
imamo kompleten dostop do vseh vezij v napravi,lahko začnemo z popravilom.
Hitro ugotovimo da je v vhodno/izhodnem vezju napaka in sicer skoraj kratki
stik v napajanju. Odklopimo konektor in preverimo
linije.
Now we
have complete access to all the
circuits in the device, we can begin to repair. Quickly figure out that the
input/output circuit failed by almost a short
circuit in the power supply. Disconnect
the connector and check all
lines.


Ugotovili
smo da je v okvari blok kondenzator C42. Če ga odspajkamo
naprava deluje. Zamenjamo ga z novim in sicer iste vrednosti 100nF/50V.
We have
found the defective block capacitor C42. If you unsolder it, device works. Replace it with a new one and at the same value 100nF/50V.

Preden napravimo
sestavimo jo še preizkusimo. Zaradi boljše elektronke imamo dobre rezultate
oziroma boljše zvok. Napravo sestavimo v obratnem vrstnem redu,kot smo jo
razstavili.
Before assembly
device,tested it first. Because of better
tube we have good results and
better sound. Assembly the device
in reverse order, as we disassembled it.

Opozorilo:AudioLogs ne odgovarja,za morebitne
napake med postopkom ali za škodo ki se lahko zgodi. Preden se lotite popravila
izključite aparat iz omrežja. S posegom v aparat lahko poškodujete vezje. Bodite
previdni pri popravilu vezja ,ker lahko poškodujete ploščo tiskanega vezja in
povezave. Če tega posega niste vešči naj za vas to opravi strokovnjak.
Warning: AudioLogs is not responsible, for the errors during the procedure or damage that may occur. Before you start to repair,plug
out unit from the network. By intervening in unit could damage the circuit. Be careful when you repairing
the pcb, you
can damage the pcb. If you are not skilled in this practice
should be done for you an expert.
AudioLogs,January2014,info@audiologs.com
If the information was useful for you, you can