Behringer MX1604a repair/popravilo
![]()
![]()
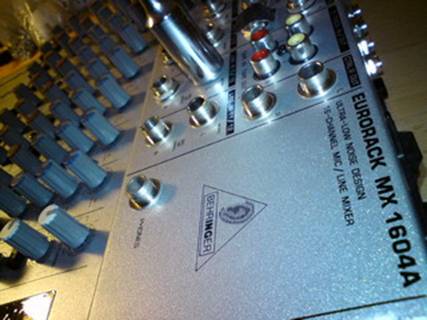
MX1604A
Repairing the
jack socket/popravilo jack vtičnice
Zaradi
dotrajanosti ali slabega vzdrževanja,izpostavljanja tekočinam,transporta itd..se
nam lahko večkrat zgodi da odpove kakšen elektronski element. Naprava ne moremo
uporabljati pravilno.
Due to expire
or poor maintenance, exposure to liquids, transport, etc. .. we may
happen several times to faul the
electronic element. The
device can not be used properly.

Previdno
odvijemo spodnji del. Odvijemo tudi vijake na straneh. Previdno dvignemo pokrov
naprave.
Carefully unscrew the bottom. Unscrew the screws on the sides. Carefully lift the cover off the device.


Ker bomo morali odstraniti tudi vezje z vtičnicami moramo
odviti vse matice in vijake na vtičnicah. Pazimo da ne poškodujemo zgornje
strani ohišja.
Because we have to remove the circuit board with sockets we need to unscrew all the nuts and bolts on the socket.
Take care not
to damage the upper side of the housing.

Odstranimo tudi vse gumbe na mešalnih potenciometrih kakor tudi na okroglih potenciometrih.
Remove all
the buttons on the mixing potentiometers
as well as round potentiometer.


Pazljivo
odstranimo celotno vezje z ohišja. Šele sedaj lahko začnemo z
popravilom jack vtičnice.
Morali jo bomo odspajkati, da lahko odstranimo
zlomljen del jack vtikača
Carefully remove
the entire circuit from housing.
Only now can we begin
to repair the jack socket. We'll have to unsolder it, that we can remove a broken part of the jack plug.


Odspajkamo priključne pine konektorja na spodnji strani vezja. Previdno
izvlečemo jack vtičnico.
Sedaj lahko odstranimo del zlomljenega jack vtikača,to je njegova konica,ki smo jo
izvlekli iz vtičnice.
Unsolder terminal pins of the
connector on the underside of the
circuit board. Carefully pull out the jack
socket. Now you can remove
the broken part of the jack
plug, it's his tip, which was pulled from
the socket.


Pregledamo,če
je vse vredu in onovno prispajkamo vtičnico. Vezje z ostanki tekoče spajkalne
paste očistimo z alkoholom. Očistimo tudi zgornjo stran ohišja.
Examine if
everything is O.K and re-solder
the socket. Clean the circuit
with the remains of the
liquid solder paste with alcohol. Clean
the upper side of the
housing also.

Napravo sestavimo v nasprotnem vrstnem redu,kot smo jo
razstavili.
Assembly the device
in reverse order, as we disassembled it.


Opozorilo:AudioLogs ne odgovarja,za morebitne
napake med postopkom ali za škodo ki se lahko zgodi. Preden se lotite popravila
izključite aparat iz omrežja. S posegom v aparat lahko poškodujete vezje. Bodite
previdni pri popravilu vezja ,ker lahko poškodujete ploščo tiskanega vezja in
povezave. Če tega posega niste vešči naj za vas to opravi strokovnjak.
Warning: AudioLogs is not responsible, for the errors during the procedure or damage that may occur. Before you start to repair,plug
out unit from the network. By intervening in unit could damage the circuit. Be careful when you repairing
the pcb, you
can damage the pcb. If you are not skilled in this practice
should be done for you an expert.
AudioLogs,March2014,info@audiologs.com
If the information was useful for you, you can